If you have enabled the guest list, you can grant or revoke access to event attendees.
This can be done via the Access Control tab of your cockpit page. The manage guest list function is found at the bottom of the page:

In the guest list, you can
- set allowed domains
- add or edit guests
- import guests from a .csv file
- allow or revoke access to guests
- send invite personal links
- customize multiple invite e-mail templates
- schedule your invitations to be sent at a specific time
- export lists of guests to a .csv file
For each guest, you can set their tags and roles. Specifically, you can use tags to limit the access to rooms.
You can assign the roles of host or speakers to attendees.

These tags and roles are automatically attributed once everyone logs in to the event with their personal access link.
Allow users from specific domains in events
Use this feature to enable event access for users from a particular organization.
To begin, click on Allowed Domains.
In the dialog box, add the domain(s) that you want to allow.

Customize calendar invite description
You can now customize registration emails and invite emails from the guest list by clicking on Invite Email Template.
You can now create and save more than one e-mail template, and you can also schedule when a specific template should be sent out.
Schedule sending of e-mail template
To this, select the desired email template and hover over it.

Click on "Manage Schedule" and then click "New Schedule":

Where required, you can restrict the recipients by tags or roles. Then press Save.

Customize your e-mail template
You can now create and save more than a single e-mail template. In this way, you can create multiple versions of the same e-mail invitation.
Specifically, you can use the e-mail editor to customize:
- The registration email (sent whenever a user signs up for the event)
- The invite email: (sent by the host from the guest list section to provide the personal access link).
In addition, you can also enable a personalized calendar invite description, where you can input your desired text.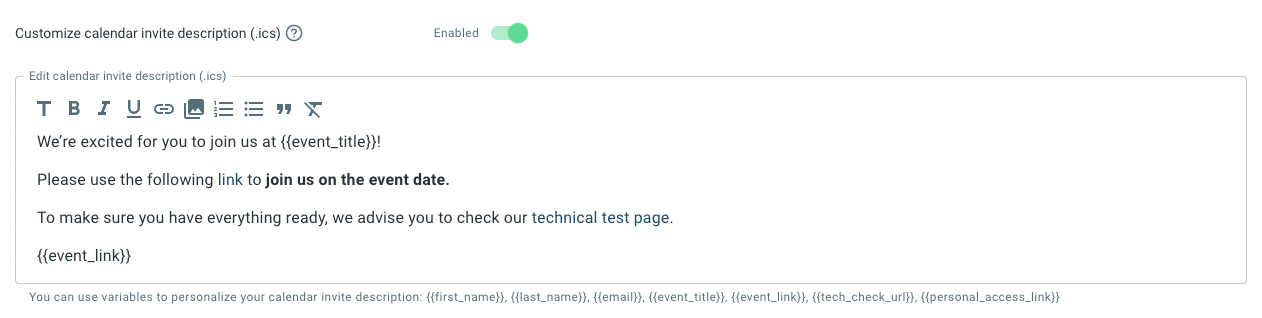
| If a custom calendar invite content has not been specified, the system will use the default event description. |