After creating each required role and user, use groups to assign the role(s) to a user. See also the "Groups" chapter.
To assign one or more roles to a user, proceed as follows:
- Click the "Groups" entry in the navigation pane. The list of all groups will appear in the middle pane of the browser window. The "Company" group is listed by default.
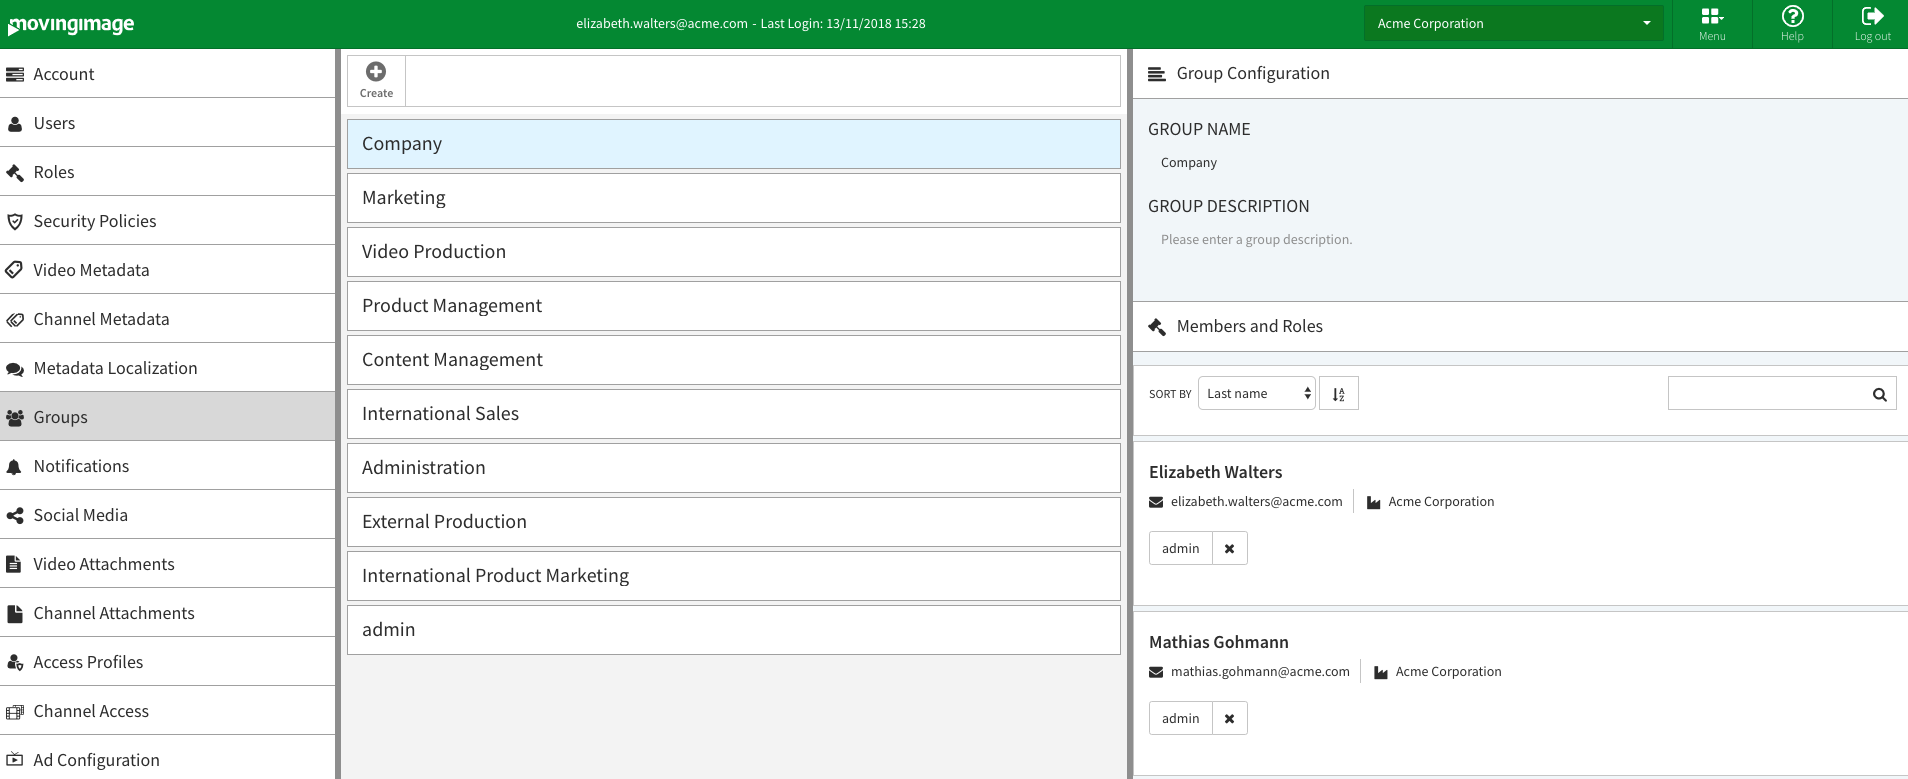
- Click the "Company" group to open an edit pane to the right.
- In the edit pane, you can make following changes:
- Group Name
- Group Description
- All created users are listed in alphabetical order under the "Members and Roles" menu. A search function is available to help you find the desired user entry. You can also sort the user list according to the following criteria:
- Company name
- Firstname
- LastName
- Telephone
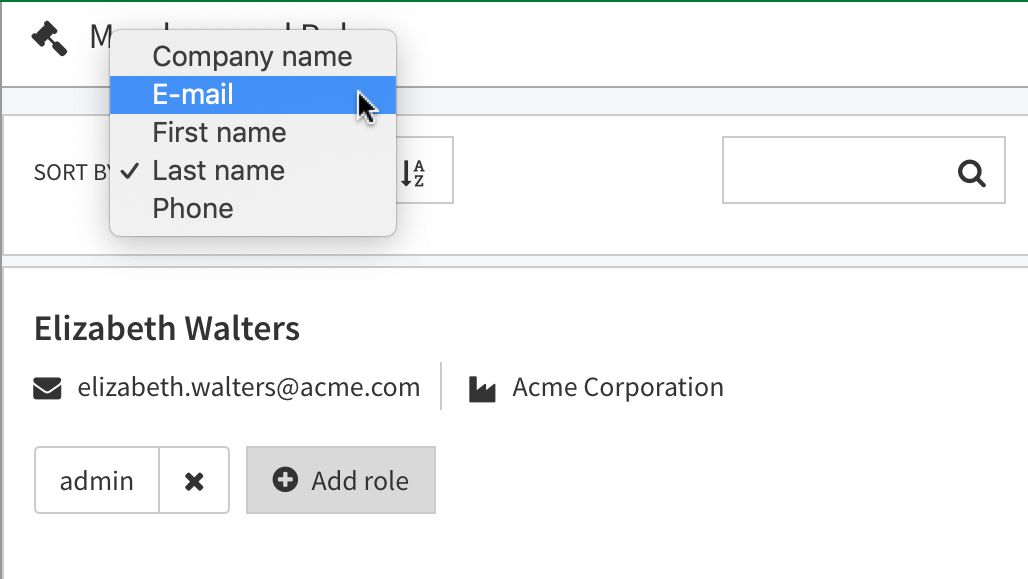
- Each user entry displays an email address, a company name (if one is defined in user management), and a list of the user's existing roles.
- To assign a role to a user, click the [Add role] button. This opens a drop-down menu where you can select additional roles.

Click the [
 ] icon to confirm your selection. Add more roles as described to this user account as needed.
When multiple roles are assigned to a user, the rights they grant are "additive". This means that if one role grants the right to edit, and another one assigned to the same user doesn't, that user maintains the right to edit.
Click the [
 ] icon to remove any role.
Every user must have at least one role in the group, thus removing the last role from the user also removes the user from the group. This is true of all groups except for the "Company" group. The "Company" group must contain every user, thus it is not possible to delete the last remaining role assigned to a user in this case.
There must always be at least one person with an administrator role within each group. Thus, it is not possible to remove the last admin user from a group.