You need to have either the Administrator or Webcast Editor role assigned to your account before you can create custom registration forms.
As an Administrator or a Webcast Editor, you may want to customize the registration form used when your users log-in to WebcastConsumer to view your Webcasts. The information gained from these custom registration forms can help you analyze your audience and gather important statistical data about who is viewing your webcasts and why.
Once created, custom registration forms can be re-used for multiple Webcasts, or set as the default when creating any new Webcasts.
If your company operates within the European Union, or anticipates the collection of registration data from viewers in the European Union, the EU General Data Protection Regulations may apply. It is recommended to configure a connection to your company privacy policy under the Customer menu option. Contact movingimage Professional Services if you need assistance.
Creating a Custom Registration Form
To create a custom registration form, perform the following steps:
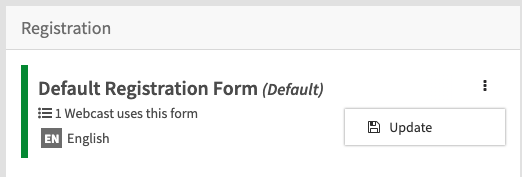
- In the navigation panel, click "Forms". In the editing area, you will see a list of all previously created registration forms. The current default form will always be listed first.
- Click the blue [ Create ] button on the right-hand side to create a new custom registration form. The create form will open.

- From here, you can set up your custom form. First, you'll need to give your form a name. ("Name" means the name you want to use for the form (for example, "German Registration Form"). This is for easy reference later in the registration form list, and will not be seen by registrants. )
- You can set multiple languages that you want to display your form in. By default, the first language shown matches the default language for your customer account. The full list of supported languages is English, French, German, Italian or Japanese. When you add another language, existing fields from the default language are automatically copied to the newly added language. Click the X to delete an additional language.
- To add a custom form field, click the [ Add a form field ] button. The custom form field dialog will open.
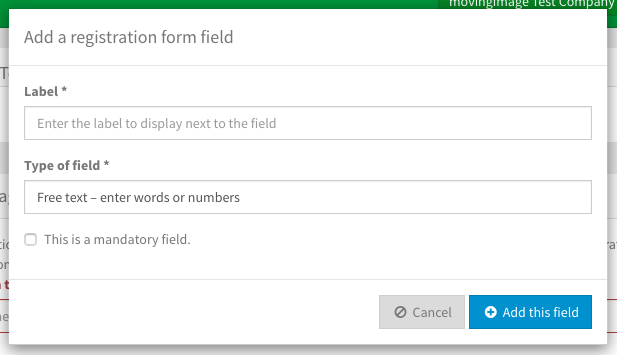
From here, you can add a label for your field (for example, "State") and the type of field (ie, free text) and select whether the field is mandatory or not.
Field Type Description Free text Creates a text field for your form where your registrants can type in any information they wish. Radio button Creates a choice with radio buttons, allowing your registrants to choose only one option from a selection you give them. Check box Creates several check boxes for your form, allowing your registrants to check as many of them as they wish. Single select Creates a drop-down menu with a selection you define, for your registrants to choose one option from. Multi-select Similar to the single-select field, except your registrants can choose more than one option. Country Creates a drop-down menu of all the countries in the world that your registrants can select from. A number of commonly-selected countries are listed first. If you select radio button, check box, single select or multi-select, an additional field will open, called "Options to show". In this field, you can create tags that will be shown as options for your users to select when viewing your form. You must add at least two tags.
When exporting data as a .CSV file, field labels will become column header names. Going back and making changes to these labels will not alter the column names. We recommend that you not change the meaning of a field label to avoid having confusing data in the export file.
- When finished, click the [ Add this field ] button to save, or click [ Cancel ] to go back to the editing area.
- If you would like to make changes to an existing form field, click the triple-dot icon next to the name of the field you would like to edit. Select either edit or delete.

- To save your form, click the blue [ Update ] button. To preview how your viewers will see your form, click the yellow [ Preview ] button to open it in WebcastConsumer.
- Later, if you would like to edit this form, click the triple-dot icon next to the name of the form you want to edit in the list of all previously created forms and select "Update".
Previewing a Custom Registration Form
Once you have created your custom registration form, you may wish to see and test how your registrants will interact with it.
To preview a custom registration form:
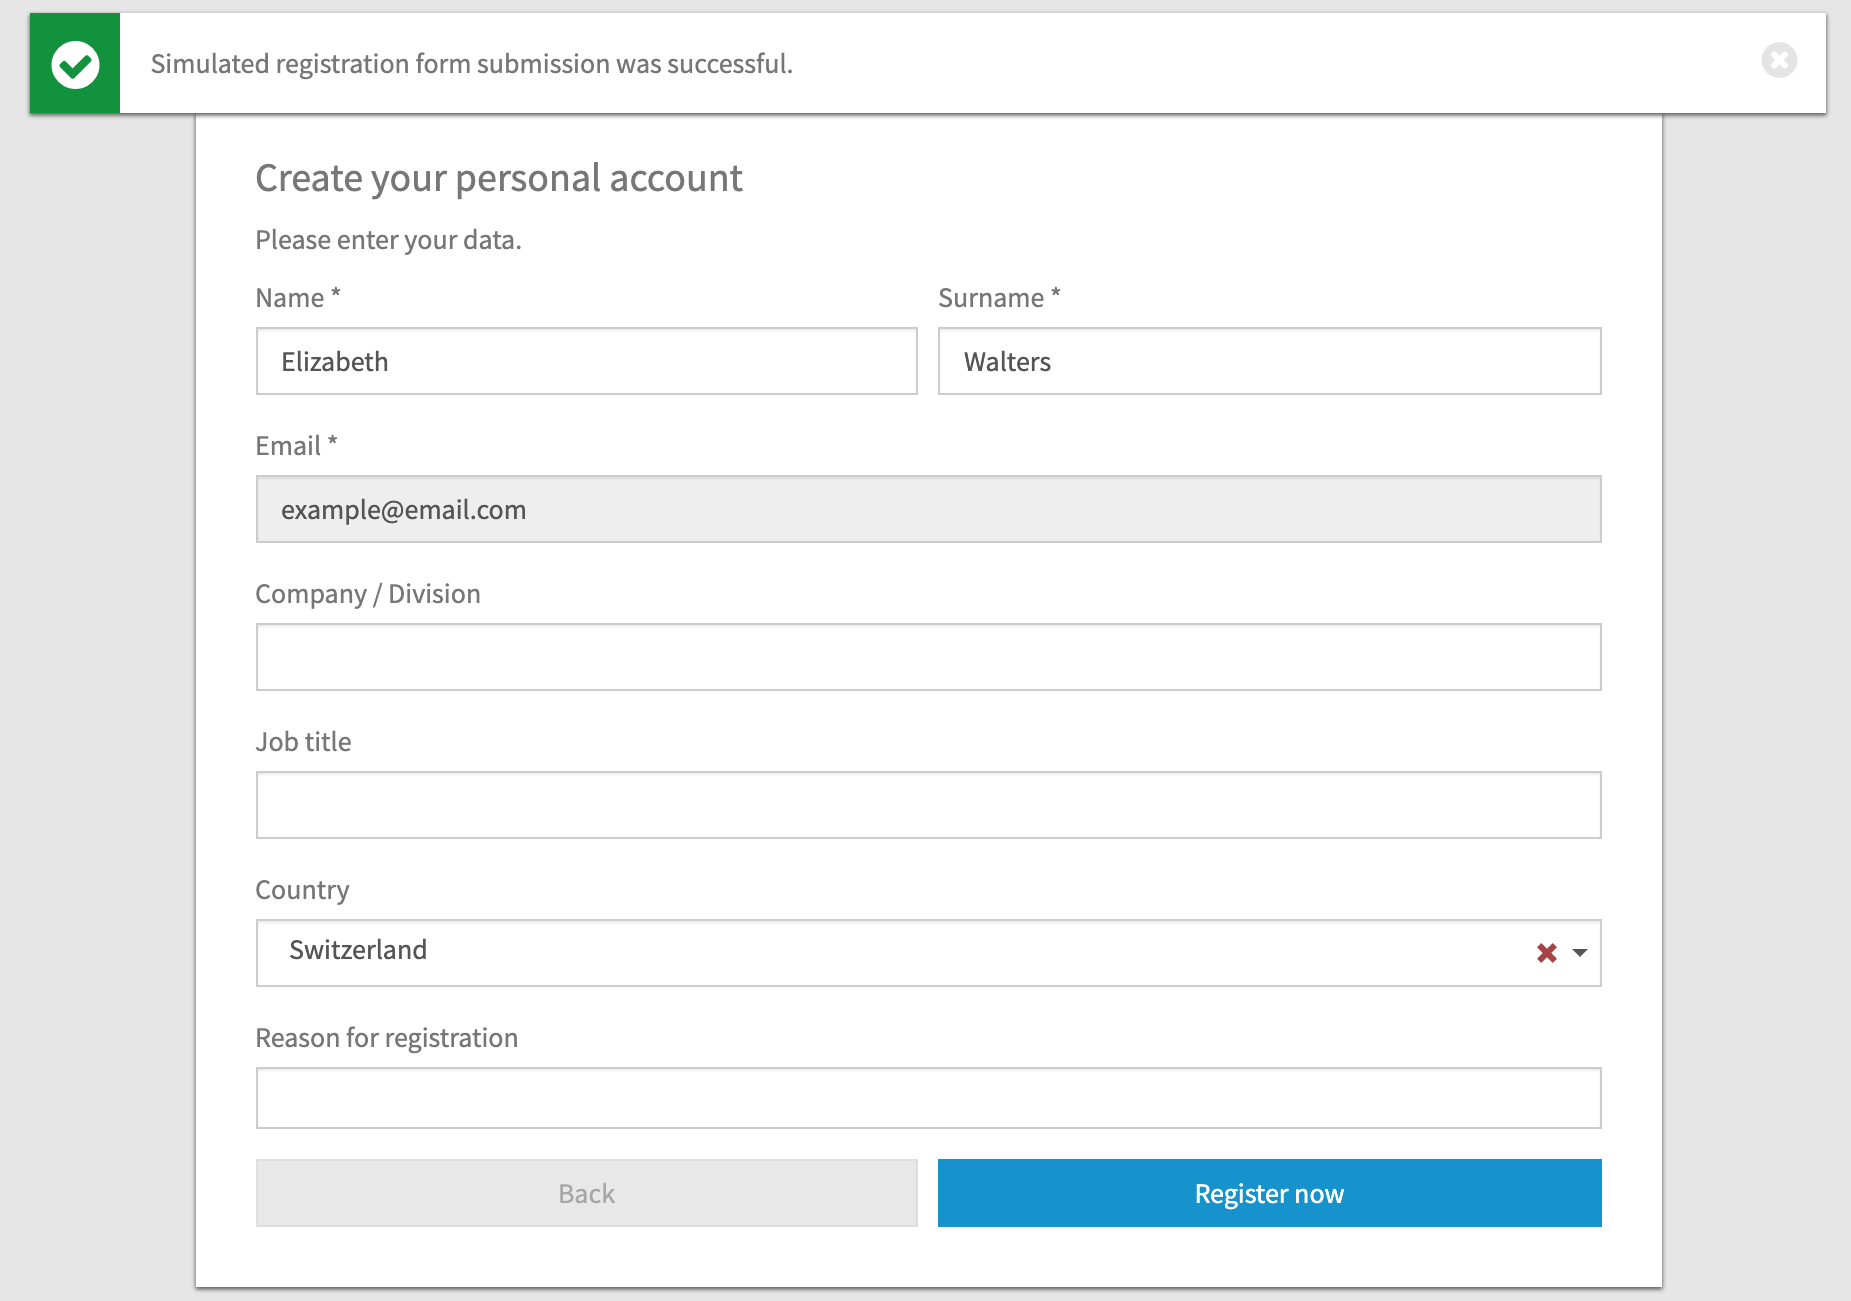
- Save any changes or edits you have made. Click the yellow [ Preview ] button at the top right-hand side of the editing area. This will open a preview form in WebcastConsumer.
- From here, you can test how your form will behave when registrants enter information. You can enter and submit information in each field (note that no information you enter will be saved).
- You can test if your form will submit correctly by clicking the "Register now" button. A confirmation message will appear if it was submitted successfully.