Note
Use the Languages tab to enter the title and description of your Webcast.
If the title and description fields in the language tab are left blank, the Webcast Manager will instead use the title and description in the Configuration tab as a fallback.
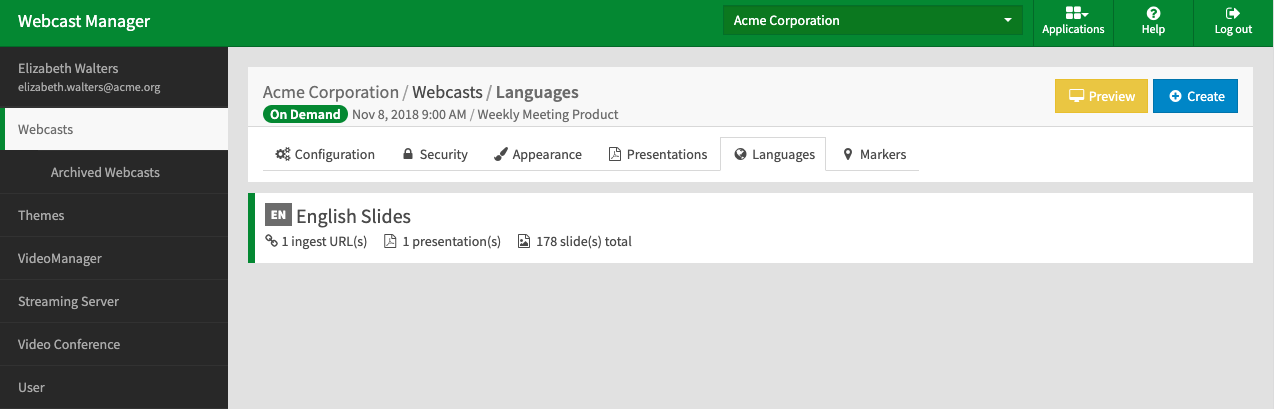
To make your webcast available in multiple languages, use the "Languages" tab to create and edit multiple language "sets" for your webcast.
Consult this article for the list of supported languages.
In addition to specific languages, you can also select the floor language.
This option is particularly useful for multilingual webcasts where speeches are delivered in different languages one after another.
Language sets comprise the stream URLs and slide presentations associated with the specified language. Each set must contain the same number of presentations and slides.
One language set is created by default for each new webcast; this will be the primary language.
The default language for this first set will match the one used by the linked streaming server.
The content of additional language sets will be compared to the first set in the list (usually the default set unless that one is later deleted).
Click [+ Create] to create a new language set. Find out which languages are supported here.
Configure your language settings in each edit pane as follows:
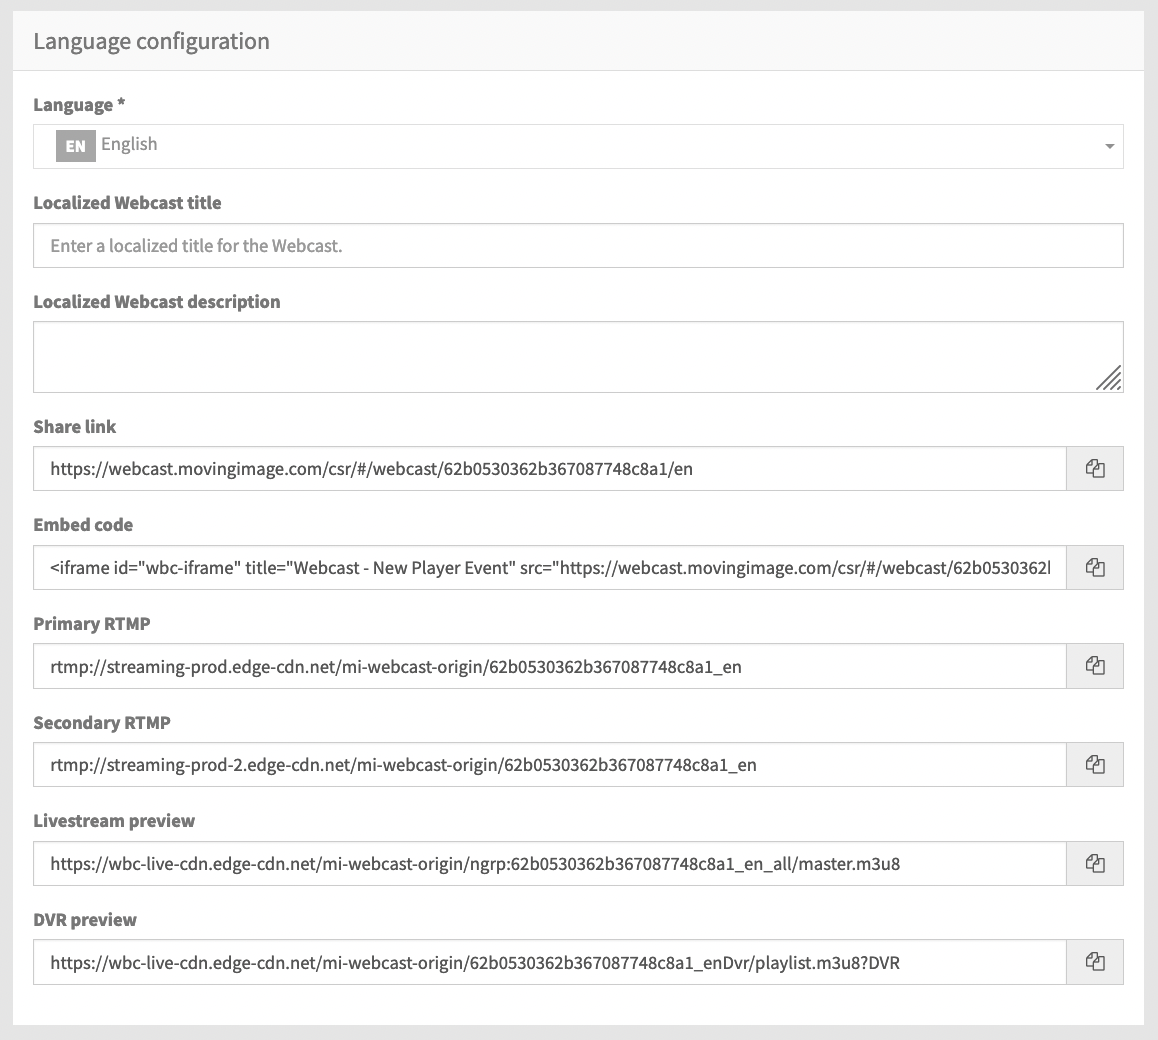
Language Configuration: Language Select your language. Localized Webcast title This field lets you specify a localized title for this language stream of your webcast. Share link Using this link will allow people to view your webcast via WebcastConsumer.
Embed Code Embed your webcast into a webpage using iFrames. See the "Embedding a Webcast in another webpage" chapter for more details. Primary RTMP RTMP URL for your webcast.
Secondary RMTP Backup RTMP URL for your webcast. Consult this article for more information. Livestream Preview Preview your webcast in the browser. DVR Preview Preview the DVR of your webcast in the browser. On Demand: select a source This edit pane allows you to set up an individual source for each localization, which will stream after the webcast is over and the status has been switched to "On Demand". 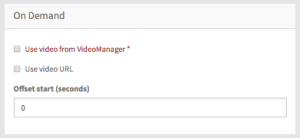
Use video from VideoManager This feature requires a pre-existing Video Manager account to be in place.
VideoManager selection: From the drop-down menu, select the desired VideoManager.
Channel selection: From the drop-down menu, select the channel in which your desired video is located.
The channel structure in the drop down menu reflects the order of the channels (including the sub-channels) in your VideoManager.
Video selection: From the drop-down menu, select the desired video.
If the webcast is configured to upload the live stream to a VideoManager, it will upload as soon as the webcast status changes from "Live" to "Post live". When the stream begins to upload, the corresponding video for each language set will be selected automatically if no selection has already been made.

Use video URL If you have selected this option for your stream, you can define the appropriate HLS URLs.
HLS URL: Enter the appropriate HLS URL.
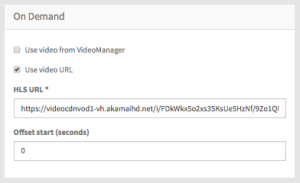
Offset start (seconds) Define the starting time of the video stream (in seconds). If the value is set to 0, the specified video starts from the original beginning.
Should you have set a different starting time, presentation slides, which were set before the specified time are no longer displayed. This is also updated accordingly under the tab "Marker".
When "Use video URL" is selected, the offset value is only applicable to HLS streams using Akamai CDN; the Akamai account must be enabled for Stream Packaging.
Presentations: Add a presentation Add as many presentations to your set as desired.
Only presentations tagged with the selected language or "ALL" are visible in the drop-down menu.
If necessary, drag and drop presentations to place them in their desired order. In WebcastOperator, they will be visible in the same order.
The first slide in the first presentation is displayed in pre-live, the first slide of the last presentation is displayed in post-live (if DVR is not selected).
You can make one presentation available for download in the consumer area by selecting the "Activate download" option from the context menu of the desired presentation.
For example, this could be a summary presentation for the entire event.

Click [Save] to save your changes.
Repeat steps 1-3 for additional language sets.
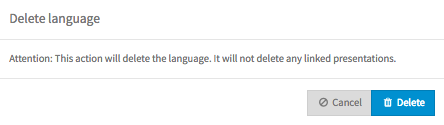
To delete a set, open the context menu of the desired entry in the list. Then click the [Delete] button. A confirmation dialog opens.
There must always be at least one language set per webcast, thus it is not possible to delete the last remaining language set.
Click the [Delete] button. Deleting a set will not delete the linked presentations.
Each set must contain the same number of presentations and slides. Notifications will appear if any of the sets are incomplete.
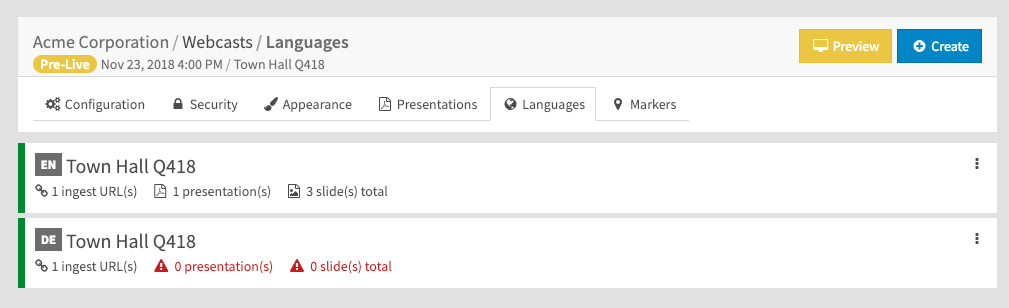
The image above shows two language sets containing mismatching presentations. For the second language set to be complete, it should contain the same number of URLs, presentations, and slides as the first. Click on a set to edit the presentations (add, remove, change, reorder, etc.).