 DE
DE
Settings for the stream which will be available after the actual event, are made in the Post-live area.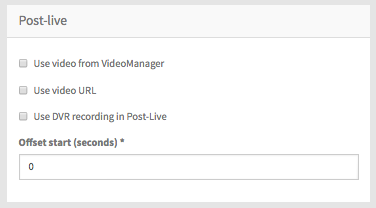
First, select which video source you want to have for your webcast or whether it is an "Audio only" stream. To do this, select the corresponding check box. Depending on your selection, you must perform further configuration. The following options are available:
This option requires that at least one VideoManager has been set up.

Make the following settings:
| Parameter | Description |
|---|---|
| VideoManager selection | From the drop down menu, select the desired VideoManager. |
| Channel selection | From the drop down menu, select the channel in which your desired video is located.
The channel structure in the drop down menu reflects the order of the channels (including the sub-channels) in your VideoManager . |
| Video selection | From the drop down menu, select the desired video. |
| Offset start (seconds) | Define the starting time of the video stream (in seconds). If the value is set 0 the specified video starts from the original beginning. |
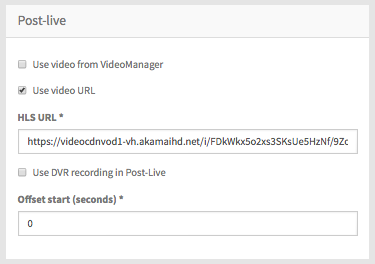
Make the following settings:
3. Use DVR recording in Post-live
If you want to play out the DVR recording of the live event, select this option.
4. Audio only
Activate this checkbox, if only the audio track should be made available. Furthermore, you can optionally display a screenshot during the stream. To do this, specify the URL to the desired screenshot.
