If you'd like to make your webcast available in multiple languages, use the "Languages" tab to create and edit multiple language "sets" for your webcast. Language sets consist of the stream URLs and slide presentations associated with the specified language. Each set must contain the same number of presentations and slides. One language set is created by default for each new webcast; this will be the primary language. The default language for this first set will match the one used by the linked streaming server.

The content of additional language sets will be compared to the first set in the list (usually the default set unless that one is later deleted).
- Click [+ Create] to create a new language set.
Select your language. New streaming URLs will be generated and shown for the selected language.

The Hive streaming URL and checkbox will only display if the selected customer is a consumer and has a Hive enabled account. These options are configured when creating a customer; more information about Hive can be found on the linked page as well.
Optionally, give your Webcast a localized title for this language set.
Use the [Presentations] drop-down menu to select presentations to assign to your set.
Only presentations tagged with the selected language or "ALL" are visible in the drop-down menu.
Click the [Add] button to add the selected presentation to the list.
Repeat steps 4 and 5 to add as many more presentations to your language set as needed.
Take note of the "Guideline" pane. Since the number and order of presentations and slides must match, the guideline pane shows you which presentations the primary language set contains. This makes it easier to quickly add the corresponding set of presentations to your new language set.
If necessary, drag and drop presentations to place them in their desired order. In WebcastOperator, they will be visible in the same order.
The first slide in the first presentation is displayed in pre-live, the first slide of the last presentation is displayed in post-live (if DVR is not selected).
You can make one presentation available for download in the consumer area by selecting the "Activate download" option from the context menu of the desired presentation.
For example, this could be a summary presentation for the entire event.
- Repeat steps 1-8 for additional language sets.
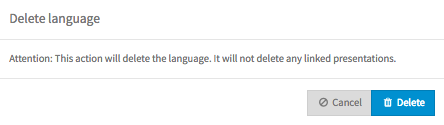
To delete a set, open the context menu of the desired entry in the list. Then click the [Delete] button. A confirmation dialog opens.
There must always be at least one language set per webcast, thus it is not possible to delete the last remaining language set.
Click the [Delete] button. Deleting a set will not delete the linked presentations.
Each set must contain the same number of presentations and slides. Notifications will appear if any of the sets are incomplete.

The image above shows two language sets containing mismatching presentations. For the second language set to be complete, it should contain the same number of URLs, presentations, and slides as the first. Click on a set to edit the presentations (add, remove, change, reorder, etc.).